Apache Guacamole 是一个基于 Web 的无客户端 HTML5 远程桌面网关,支持 VNC、RDP 和 SSH 等标准协议。它不需要任何第三方插件和客户端即可工作。您可以使用基于 Web 的网关访问您的机器。它可以放在代理服务器后面,使您可以从世界任何地方访问您的服务器。
在 AlmaLinux 8 上安装 Apache Guacamole
第 1 步。首先,让我们首先确保您的系统是最新的。
sudo dnf install epel-release
sudo dnf config-manager --set-enabled powertools
sudo dnf update
步骤 2. 安装所需的依赖项。
现在安装鳄梨酱所需的软件包:
sudo dnf install cairo-devel libjpeg-turbo-devel libjpeg-devel libpng-devel libtool libuuid-devel uuid-devel make cmake
sudo dnf install ffmpeg-devel freerdp-devel pango-devel libssh2-devel libtelnet-devel libvncserver-devel libwebsockets-devel pulseaudio-libs-devel openssl-devel compat-openssl10 libvorbis-devel libwebp-devel libgcrypt-devel
步骤 3. 安装 Apache Tomcat。
首先,在您的 AlmaLinux 系统上安装 Java OpenJDK 11:
sudo dnf install java-11-openjdk-devel
验证 Java 安装:
java -version
让我们创建一个组和用户,它只能访问 Tomcat,不能用于其他目的,例如登录系统安装或删除任何东西:
sudo groupadd tomcat
sudo mkdir /opt/tomcat
sudo useradd -s /bin/nologin -g tomcat -d /opt/tomcat tomcat
然后,从官方页面下载 Apache Tomcat 安装程序并将其保存在您的工作目录中:
wget https://downloads.apache.org/tomcat/tomcat-10/v10.0.8/bin/apache-tomcat-10.0.8.tar.gz
sudo tar -zxvf apache-tomcat-*.tar.gz -C /opt/tomcat --strip-components=1
接下来,设置正确的文件权限:
sudo chown -R tomcat: /opt/tomcat
sudo sh -c 'chmod +x /opt/tomcat/bin/*.sh'
现在我们创建 Apache Tomcat Systemd 服务。
我们需要创建一个启动脚本来将 Tomcat 作为systemd服务进行管理。让我们创建一个文件:tomcat.service
sudo nano /etc/systemd/system/tomcat.service
添加以下行:
[Unit]
Description=Tomcat webs servlet container
After=network.target

[Service]
Type=forking

User=tomcat
Group=tomcat

Environment="JAVA_HOME=/usr/lib/jvm/jre"
Environment="JAVA_OPTS=-Djava.awt.headless=true -Djava.security.egd=file:/dev/./urandom"

Environment="CATALINA_BASE=/opt/tomcat"
Environment="CATALINA_HOME=/opt/tomcat"
Environment="CATALINA_PID=/opt/tomcat/temp/tomcat.pid"
Environment="CATALINA_OPTS=-Xms512M -Xmx1024M -server -XX:+UseParallelGC"

ExecStart=/opt/tomcat/bin/startup.sh
ExecStop=/opt/tomcat/bin/shutdown.sh

[Install]
WantedBy=multi-user.target
保存并关闭,同时启动并启用 Apache Tomcat 服务:
sudo systemctl daemon-reload
sudo systemctl start tomcat
sudo systemctl enable --now tomcat
步骤 4. 在 AlmaLinux 8 上安装 Apache Guacamole。
默认情况下,Apache Guacamole 在 AlmaLinux 基础存储库中不可用。现在运行以下命令,从官方页面下载最新稳定版本的鳄梨酱:
wget https://dlcdn.apache.org/guacamole/1.4.0/source/guacamole-client-1.4.0.tar.gz
tar -xvzf guacamole-server-1.4.0.tar.gz
cd guacamole-server-1.4.0
./configure --with-systemd-dir=/etc/systemd/system/
接下来,使用以下命令编译和安装 Guacamole:
sudo make
sudo make install
sudo ldconfi
之后,systemd使用以下命令重新加载守护程序:
sudo systemctl daemon-reload
sudo systemctl start guacd
sudo systemctl enable guacd
步骤 5. 安装 Apache Guacamole 客户端。
现在我们使用以下命令下载 Guacamole 客户端文件:
sudo mkdir /etc/guacamole
sudo wget https://downloads.apache.org/guacamole/1.4.0/binary/guacamole-1.4.0.war -O /etc/guacamole/guacamole.war
然后,创建一个指向Tomcat webapps 目录的符号链接:/etc/guacamole/guacamole.war
sudo ln -s /etc/guacamole/guacamole.war /opt/tomcat/webapps/
将应用程序的权限更改为tomcat用户:
sudo chown -R tomcat:tomcat /opt/tomcat/webapps
然后,使用以下命令创建一个 Guacamole 配置文件:
sudo nano /etc/guacamole/guacd.conf
添加以下配置:
#
# guacd configuration file
#

[daemon]

#pid_file = /var/run/guacd.pid
log_level = info

[server]

bind_host = your-server-IP-address
bind_port = 4822

#
# The following parameters are valid only if
# guacd was built with SSL support.
#

# [ssl]

# server_certificate = /etc/ssl/certs/guacd.crt
# server_key = /etc/ssl/private/guacd.key
保存并关闭文件,然后重新启动 Guacamole 服务器和 Tomcat 以应用更改:
sudo systemctl restart tomcat guacd
步骤 6. 配置 Apache Guacamole。
我们需要创建一个 Guacamole 用户映射文件来定义要从 Guacamole 连接的远程服务器:
sudo mkdir /etc/guacamole/{extensions,lib}
接下来,设置 Guacamole home 变量并将其存储在配置文件中:/etc/default/tomcat
echo "GUACAMOLE_HOME=/etc/guacamole" | sudo tee -a /etc/default/tomcat
步骤 7. 设置 Apache Guacamole 身份验证。
Guacamole 的默认身份验证方法从一个名为 . 现在我们生成连接到 Guacamole Web UI 时使用的 MD5:user-mapping.xml
echo -n YourStrongPassword | openssl md5
然后,运行以下命令来创建一个新的:user-mapping.xml
sudo nano /etc/guacamole/user-mapping.xml
添加以下内容:
<user-mapping>

    <!-- Per-user authentication and config information -->

    <!-- A user using md5 to hash the password
         guacadmin user and its md5 hashed password below is used to
             login to Guacamole Web UI-->
    <authorize
            username="admin"
            password="d41e98dbmwe4611d3a70f1a5b9bmw"
            encoding="md5">

        <!-- First authorized Remote connection -->
        <connection name="AlmaLinux 8 Server SSH">
            <protocol>ssh</protocol>
            <param name="hostname">192.168.77.21</param>
            <param name="username">chedelics</param>
            <param name="port">22</param>
        </connection>

        <!-- Second authorized remote connection -->
        <connection name="Windows Server 2019">
            <protocol>rdp</protocol>
            <param name="hostname">192.168.77.20</param>
            <param name="port">3389</param>
            <param name="username">idroot</param>
            <param name="ignore-cert">true</param>
        </connection>

    </authorize>

</user-mapping>
保存文件并重启 Guacamole 和 Tomcat:
sudo systemctl restart tomcat guacd
步骤 8. 配置防火墙。
允许防火墙访问端口 4822 和 8080,然后使用以下命令重新加载它:
sudo firewall-cmd --permanent --add-port={4822,8080}/tcp
sudo firewall-cmd --reload
步骤 9. 访问 Apache Guacamole Web 界面。
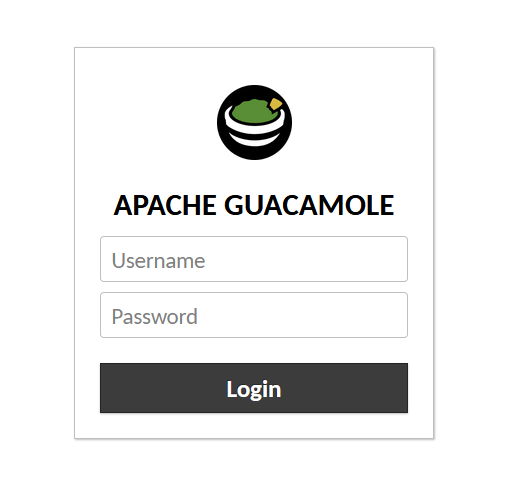
成功安装后,您可以使用以下地址从 Web 浏览器访问它, 然后您应该会看到 Apache Guacamole 门户以登录:http://localhost:8080/guacamole.

感谢您使用本教程在您的 AlmaLinux 8 系统上安装 Apache Guacamole 远程桌面网关。如需更多帮助或有用信息,我们建议您查看Apache 官方网站。


